Securing your home with a burglar alarm doesn't have to involve professional services or hefty installation fees. Believe it or not, installing your own alarm system is entirely feasible, even for those who consider themselves more on the novice side of the DIY spectrum. This endeavor not only saves you some money but also adds a layer of understanding about how your home's security works.
Choosing the right alarm for your abode is an important first step. The market offers a vast range of burglar alarms, each with its own unique set of features and specifications. Knowing what you need beforehand simplifies this process significantly, ensuring your choice effectively meets both your security requirements and budget constraints.
Once you have zeroed in on the right system, it's time to gather the necessary tools for installation. These typically aren't too exotic—think drills, screwdrivers, and a ladder—making it easy for you to hit the ground running.
- Understanding Burglar Alarm Basics
- Choosing the Right Alarm System
- Essential Tools and Equipment
- Step-by-Step Installation Guide
- Common Pitfalls and How to Avoid Them
- Maintaining Your Alarm System
Understanding Burglar Alarm Basics
When venturing into the world of DIY home security, grasping the fundamentals of a DIY burglar alarm system is crucial. Burglar alarms have evolved considerably over the years, transitioning from simple noise-makers to sophisticated systems with a variety of alert mechanisms. At their core, these systems are designed to detect unauthorized entry into a building or area. They typically consist of several components, each playing a pivotal part in the overall function. Sensors are the bread and butter of burglar alarms, capable of detecting motion, vibrations, or opening and closing activities. These sensors are generally placed at potential entry points such as doors and windows.
Control panels, the brains of the operation, are another key element. They are tasked with receiving signals from the sensors and responding by triggering alarms or sending alerts. Modern systems often integrate with smartphones, offering remote access and control, which is a significant upgrade that many homeowners appreciate. Alarms themselves can be audible, like a piercing siren intended to scare off intruders, or silent, alerting the authorities or sending notifications to your device. The choice depends largely on personal preference and security needs.
Interestingly, the first burglar alarms date back to the 19th century, with Augustus Russell Pope patenting the electric burglar alarm in 1853. This system has, of course, developed into sophisticated digital designs we see today, but the essence remains the same: deterring unauthorized access and notifying homeowners or authorities. Delving into history sheds light on just how far we’ve come. To appreciate modern advancements, it's truly fascinating to consider what early systems accomplished with the technology of their time.
"The goal of a successful burglar alarm is to not only alert but to deter," notes security expert Paul Rosenzweig. "When potential intruders see a well-maintained alarm system, it often discourages attempts, providing a deterrent effect as crucial as the alert itself."
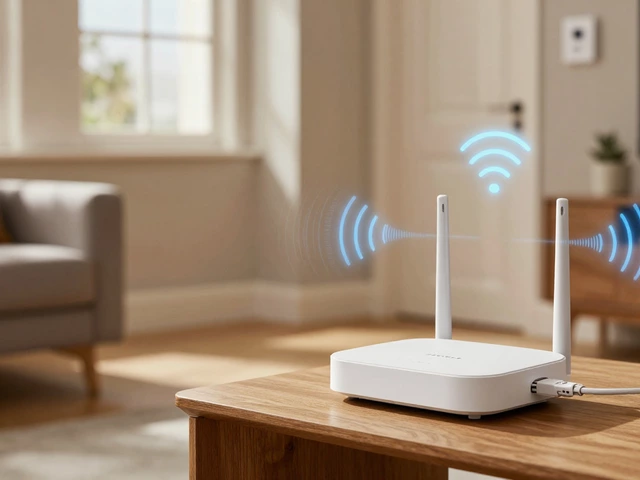
For homes incorporating the latest home security innovations, smart alarm systems are now common. These systems use Wi-Fi connectivity, linking to your home network effortlessly, and feature integration with other smart home devices like lights and cameras, enhancing their functionality. As the Internet of Things continues to grow, security solutions embracing smart technology become more appealing to tech-savvy homeowners.
Before diving into the process of alarm installation, it’s also beneficial to understand the different types of alarms available. Wired systems, for instance, offer reliable connections but may require more complex installation processes, drilling into walls, and routing cables. In contrast, wireless alarms have become more popular due to their flexibility and relatively straightforward installation, though they might be prone to interference from electronic devices.
To gain a well-rounded understanding, one might consider the costs involved. Alarm systems fall within a wide range of prices. More advanced features can push costs higher; therefore, defining your security priorities is essential before purchase. In some cases, a basic system is enough, while others may seek higher-end models for their added sophistication and extra layers of protection.
Choosing the Right Alarm System
When it comes to selecting a DIY burglar alarm, the options are varied and sometimes overwhelming. Your first consideration should be the type of coverage you need. For apartments or smaller homes, a basic system with door and window sensors might suffice. Larger households, however, might benefit from more comprehensive systems that include motion detectors and surveillance cameras. Wired systems tend to be more reliable as they're not susceptible to electronic jamming, but wireless systems are often easier to install and offer more flexibility with placement — a critical factor to consider if you’re renting.
Before making your decision, it’s wise to set a clear budget. Burglar alarms range from very affordable options in the lower spectrum to high-end systems with monthly monitoring fees, which can add up over time. Basic systems might cost around $100, while those with professional monitoring services can exceed $600 annually for more robust security setups. You'll want to decide whether features like smartphone control, compatibility with smart home devices, or video recording are essential for you. A report from Security Sales & Integration highlights that 70% of consumers prioritize ease of use and integration with smart technology when selecting their systems.
Another factor to weigh is the brand reputation and reviews. Research what current users are saying about their experiences with installation and reliability. User reviews and expert recommendations can provide insight into the actual performance of a system. A well-regarded brand is more likely to offer better customer support and reliability. Consider reading publications like Consumer Reports which are known for providing unfiltered evaluations of home security systems.
To bring a wider perspective to this,
"A good security system doesn't just deter criminals, it provides peace of mind and empowers the homeowner, knowing they have control over the safety of their property," states James Rogers, security analyst at Home Protections Quarterly.Harnessing this peace of mind can often mean investing in professional-grade features like remote monitoring or automatic notifications for unusual activity at home.
For those who love data, here's a quick comparison of alarm features by popularity among homeowners:
| Feature | Percentage of Homeowners |
|---|---|
| Wireless Systems | 55% |
| Smartphone Control | 63% |
| Professional Monitoring | 48% |
| Video Surveillance | 40% |
Investing the time to choose the right system means considering every angle. It's about balancing your immediate needs with an eye towards future scalability. Your choice should ultimately reflect your lifestyle, ensuring the system integrates seamlessly while safeguarding what matters most — your home and family.
Essential Tools and Equipment
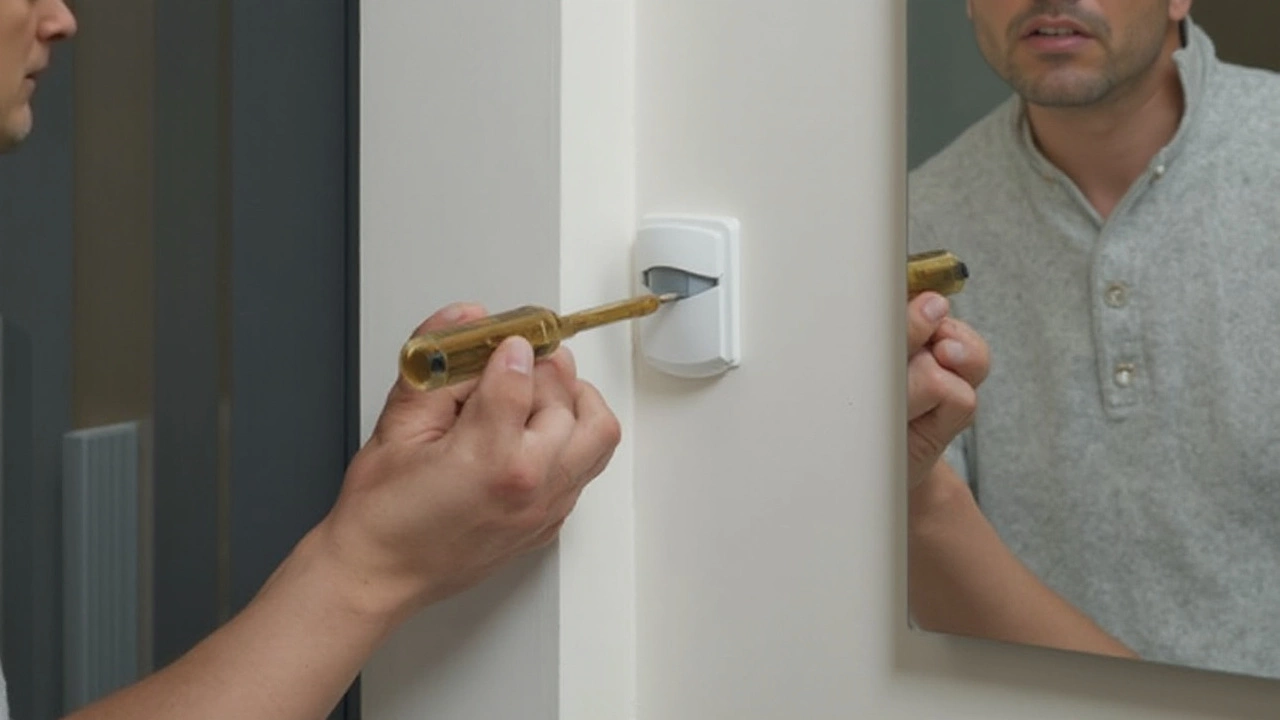
Embarking on the journey of installing your own DIY burglar alarm means equipping yourself with both knowledge and the right tools. It’s a straightforward process when you have a clear understanding of what is needed. You'll find that many of these tools are common in most households, making the task less daunting than it might initially seem. The usual suspects like a power drill, screwdriver, and ladder are must-haves for this project. A power drill comes in handy for creating holes for mounts or running wires. If your installation is wireless, it may be less physically demanding, but a screwdriver is still your best friend for securing mounts and tightening screws.
Before we dive any deeper, let's talk about a stud finder. This is a handy gadget that simplifies the task of identifying the best locations to mount components, especially if you're dealing with walls that conceal wiring or plumbing. Its utility in locating studs means you can avoid drilling mishaps, keeping your home structure safe and intact. A level is another tool to consider—it ensures that your sensors and cameras aren’t crooked. This may seem trivial, but in the world of security, precision is king.
Security system kits themselves often come with basic hardware and tools for installation, but having a few spare wall anchors and screws can save you a trip to the hardware store. Don't forget about wire strippers and cutters if your system has wired components. A tape measure might also prove indispensable for ensuring correct positioning, spacing of sensors, and for achieving that all-important professional look.
According to a report by Consumer Reports, "Preparing the right tools before starting any installation can reduce overall setup time by half and minimize frustration during the process."
It’s easy to overlook, but a good quality ladder should not be neglected. Especially when installing sensors above doors or on higher ceilings; the right ladder can keep you safe while providing access to all necessary locations. Finally, having a trusty flashlight or headlamp is crucial if you find yourself working in tight or dimly-lit spaces such as basements or cramped entryways where visibility can be less than ideal.
Optional Gadgets to Enhance the Setup
As you navigate through the installation, there are a few optional gadgets that can elevate the setup process. A smart device, such as a smartphone or tablet, becomes particularly useful for setting up wireless systems. Many modern home security systems feature apps that guide you through the installation and testing phases. Additionally, a voltage tester could be a wise investment, especially for non-wireless systems, to ensure that you've safely disconnected any power sources before beginning your project.If we consider statistics, a 2023 survey by SafeHome indicated that about 65% of DIYers discover halfway through their setup that they need an unplanned tool, often a specialized screwdriver or additional wire connectors. Thus, a little preparation goes a long way in ensuring a smooth installation experience. With these tools at your disposal, you're well equipped to make your home a fortress with your own two hands.
Step-by-Step Installation Guide
Embarking on your DIY burglar alarm journey begins with understanding the intricate dance of placing your components. Ideally, you want to position the sensors and the control panel in strategic locations. The front and back doors are prime entry points for intruders, making them critical positions for motion detectors. Windows, especially those on the ground floor, deserve attention too. When drilling holes or attaching components, always ensure you don't compromise on the building's structural integrity—a crucial point easily overlooked in the excitement of setting up your new system.
The next piece in our mounting puzzle centers on the control hub or the brain of your home security system. The golden rule here is accessibility—not just for you but for the system components as well. This is where everything ties together, so placement is key. Near power sources is usually ideal, and while connectivity is wireless with many systems today, staying within range can prevent future headaches. It's worth noting that some experts advocate for placing this central component in a bedroom for easy access in case of emergencies.
Once you've mapped out your installation grid, it's time to bring out the toolbox. Begin by outfitting your doors and windows with contacts and sensors. These tiny guardians are often your first line of defense, setting off alarms when their circuit is broken. They require careful calibration; too loose and they might not trigger, too tight and they could sound false alarms. While the process might seem tedious, it is this meticulous attention to detail that ensures the security system performs optimally.
Linking all these parts is what comes next, dovetailing into the exciting realm of configuration. Interfacing your system with an app can turn your smartphone into a remote control, but this step demands patience. Configuration not only dictates how the alarm responds but also how it interacts with you. Do you want alerts pushed to your phone? Do you prefer certain notifications over others? Answering these questions tailors the experience to suit your lifestyle. And speaking of apps, some alarm systems boast integrations with smart home devices, a perk worth exploring if convenience is high on your list.
A fair word of caution about the testing phase: it’s essential. Activating your system and verifying each component functions correctly isn't something to skim over. This stage can reveal glaring oversights, like a sensor failing to communicate with the hub, or the siren being barely audible. Taking notes during this process is helpful, allowing you to address issues systematically. According to a survey by SafeHome, nearly 60% of consumers report false alarms in their first month due to improper setup—an inconvenience you're now equipped to avoid with thorough testing.
"The key to building a fortress lies in the layers you create, not in the tools you use," advises a seasoned professional from SecureHomes, highlighting the importance of strategic planning in alarm installations.
Finally, the last hurdle is one of persistence—maintaining and updating the system. Regular check-ups are crucial to ensure the longevity of your components. Keep an eye on battery levels if your system relies on them, and don't hesitate to upgrade the software when updates are available to keep security standards high. By infusing routine maintenance into your schedule, you turn your DIY burglar alarm system from a mere deterrent to an integral part of your home protection plan.

Common Pitfalls and How to Avoid Them
Installing a DIY burglar alarm might seem straightforward at first glance, but several common mistakes can lead to a system that doesn’t work as effectively as planned. One frequent oversight is improper placement of sensors. Sensors are the eyes and ears of your security system and should be placed strategically to maximize coverage. Placing them too close to doors or windows can result in tamper malfunctions, while setting them too high or low might cause them to miss critical movement signals. To ensure optimal performance, always follow manufacturer guidelines on placement and keep motion sensors away from areas where pets frequently roam.
A less obvious pitfall is ignoring the importance of regular maintenance. Many DIY installers underestimate how critical it is to regularly check the system’s functionality. Battery-operated units require periodic battery replacements to ensure they are always in working condition. Neglecting these routine tasks may render your alarm inoperative at the worst possible time, defeating its purpose entirely. A simple practice is setting a recurring calendar reminder to inspect and test each part of the system every few months.
Another issue arises from a failure to thoroughly read and understand the instruction manual before beginning the installation. Skipping steps or assuming the process based on previous experiences can lead to wiring errors or programming the system incorrectly. A meticulous approach is vital. Taking the time to read through the manual, or even watching tutorial videos, can prevent a majority of these mishaps. Don’t underestimate the value of manufacturer support either; reaching out for clarification is often just an email or call away, and can save hours of troubleshooting later on.
False alarms are a notorious challenge for new DIY system users. They can quickly lead to frustration, especially if they persist. Many false alarms are triggered by poor sensor calibration or environmental factors like drafts that cause curtains or plants to move. Learning how to adjust sensor sensitivity to match your home's specific conditions can prevent such hiccups. Regularly updating the system’s software and staying informed about any bug fixes or improvements provided by the manufacturer can also help reduce these incidences significantly.
According to a recent survey by the Electronic Security Association, self-installed systems often face issues due to insufficient planning and lack of understanding of the operational environment. 'Proper research and a strategic approach to placement and maintenance can drastically enhance system performance,' notes the association.
Finally, overlooking the importance of a backup plan can be detrimental. Power failures or internet outages could disrupt your alarm’s functionality if its overall architecture doesn’t accommodate these possibilities. Including elements such as backup batteries and cellular support is crucial to maintaining an uninterrupted security blanket. For tech-savvy individuals, utilizing smart systems that send alerts directly to your phone presents a robust alternative should something go awry. Preparing for potential scenarios ensures your home remains protected against unforeseen challenges.
Maintaining Your Alarm System
After you’ve gone through the effort of installing a DIY burglar alarm, it's crucial to keep it well-maintained to ensure continuous and optimal protection. Regular maintenance not only prolongs the life of your security system but also ensures that it functions correctly when needed most. Begin by scheduling periodic checks of the system’s components. These checks should involve inspecting the sensors, control panel, and any connected cameras. Pay attention to the battery-operated parts of your home security system. Most components will alert you when the battery is low, but it's wise not to wait for that sign. Replace the batteries at least once a year to avoid any downtime. This simple step alone can stave off a surprisingly common cause of alarm failure.
It's also important to stay updated with the latest software or firmware updates provided by your alarm system manufacturer. These updates can enhance system performance, patch security vulnerabilities, and sometimes add new features. Many modern systems enable automatic updates, but manual intervention might be required depending on the setup. Also, regularly test your alarm system's response time. This involves setting it off intentionally but responsibly. Testing ensures all components communicate properly, gauging how efficiently the alarm alerts your household or emergency contacts. The peace of mind that comes from knowing every cog in the machine works seamlessly is invaluable.
Additionally, if your system connects to a monitoring service, periodically verify that the company can receive signals from your system. This can be confirmed with a quick phone call or online chat exchange. Manage any changes in external conditions affecting your system’s operation. For instance, newly-purchased decor or furniture might block sensors unintentionally. Similarly, excessive dust, cobwebs, or moisture can interfere with sensor accuracy, especially in basements or attics. Keep these areas clean to prevent false alarms or system failures.
"Regular maintenance is key to ensuring your security system stays reliable." – Security Expert, John McMurray
Finally, every year, take a moment to consider if the current placement of your sensors and cameras is ideal. Perhaps there has been a shift in your home’s layout or security needs. Adapt as necessary to maintain robust surveillance coverage. In some cases, adding additional sensors might be beneficial. Consider integrating new technologies such as smart home compatibility. This could turn your basic alarm system into a more comprehensive smart home defense net, communicating with your mobile device or home assistant. Ultimately, a proactive approach to maintenance ensures that your alarm system deters even the most determined intruders, preserving your home’s sanctity and your peace of mind for years to come.