Security Camera Setup Assistant
Apple HomeKit
End-to-end encrypted video, built into iPhone Home app
Brand App
More features, brand-specific support
Aggregator Apps
For older or non-HomeKit cameras
| Feature | HomeKit | Manufacturer | Third-Party |
|---|---|---|---|
| Privacy | End-to-end encrypted | Cloud storage | Direct connection |
| Cost | $0.99+/mo | Free-$5/mo | $3.99 one-time |
| Compatibility | HomeKit-certified | Brand-specific | 2,300+ models |
Your Recommendation
Based on your priorities, we recommend...
Why this option?
Your top priorities (Privacy: 4, Budget: 2, Technical Skill: 3, Features: 5) suggest this is the best fit.
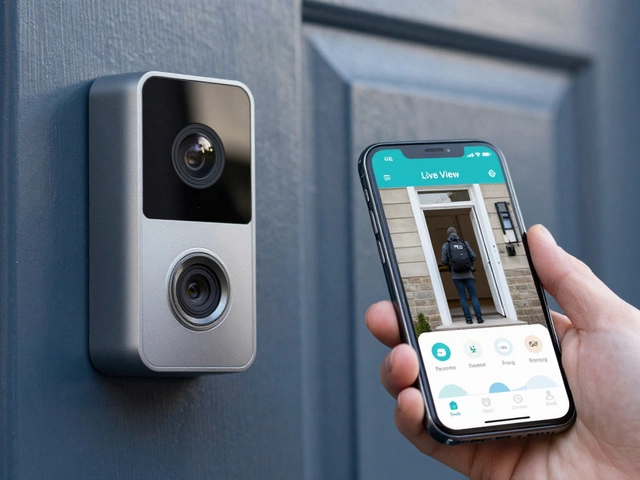
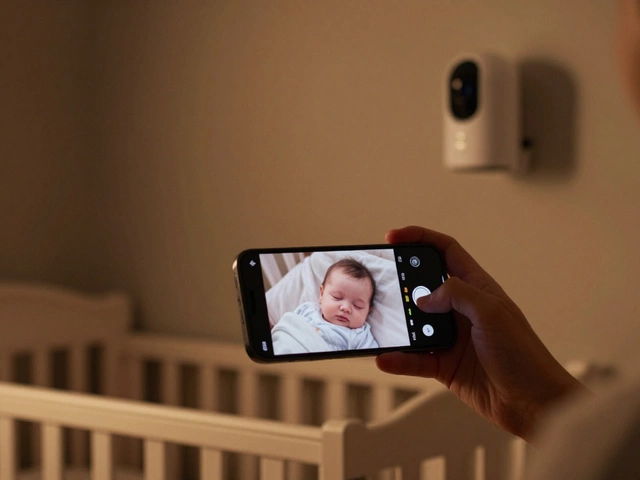
Want to check your security camera feed right from your iPhone? It’s not just possible-it’s easier than ever. But if you’ve tried before and got stuck on setup, confused by app names, or frustrated by buffering video, you’re not alone. The problem isn’t your phone. It’s the options. There are three real ways to watch your camera on an iPhone: Apple’s HomeKit Secure Video, the camera maker’s own app, or a third-party aggregator app. Each has trade-offs in price, privacy, and performance. Let’s cut through the noise and show you exactly how to do it-step by step, with no fluff.
Use HomeKit Secure Video (Best for Privacy and Simplicity)
Apple’s HomeKit Secure Video is the gold standard if you care about privacy and seamless integration. It’s built into the Home app on your iPhone, and all video is encrypted end-to-end. No one-not even Apple-can see your footage. Your camera processes video on-device using the Secure Enclave, then uploads only encrypted clips to iCloud if motion or sound is detected.
To use it, you need:
- An iPhone 6s or newer (iOS 14 or later)
- An iCloud+ subscription (50GB plan or higher)
- A HomeKit-certified camera (like Eufy SoloCam S340, Logitech Circle View, or Aqara G5 Pro)
Setup takes under five minutes:
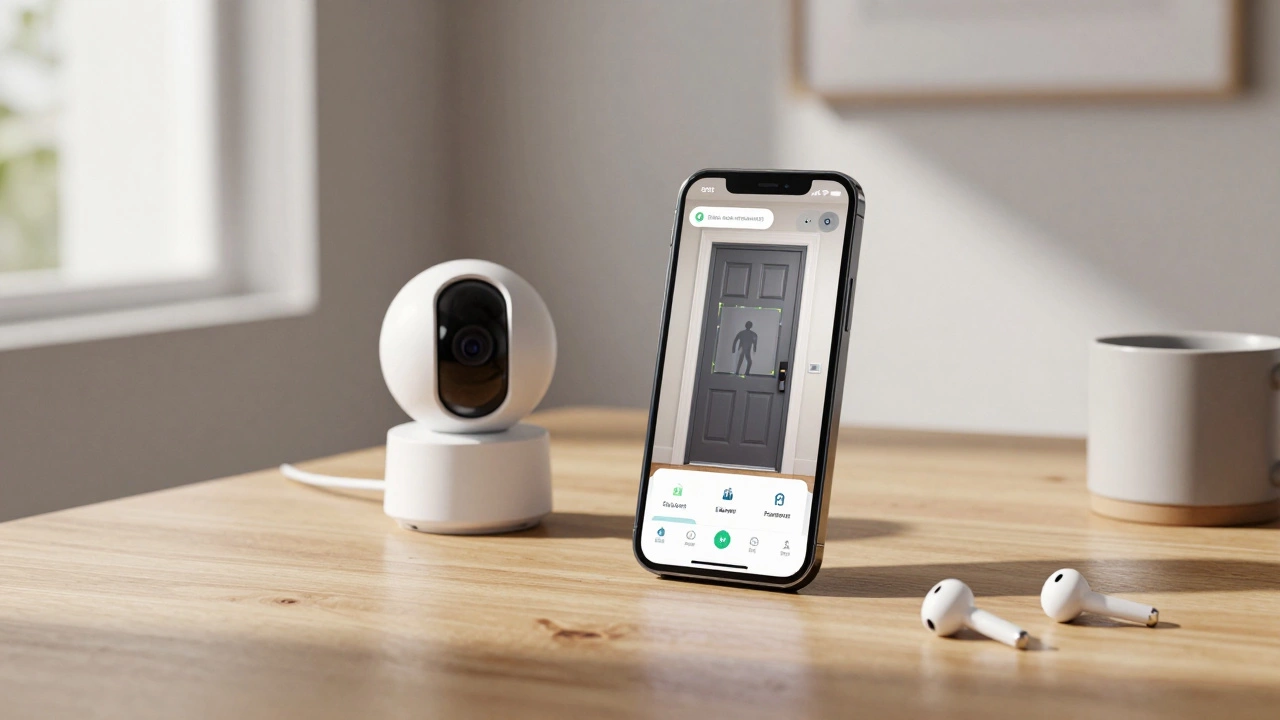
- Open the Home app on your iPhone.
- Tap the + icon, then Add Accessory.
- Point your iPhone’s camera at the HomeKit QR code on the camera or its box.
- Follow the prompts to name the camera and assign it to a room.
- Once added, tap the camera tile, then the gear icon to set up Activity Zones (up to five areas to monitor).
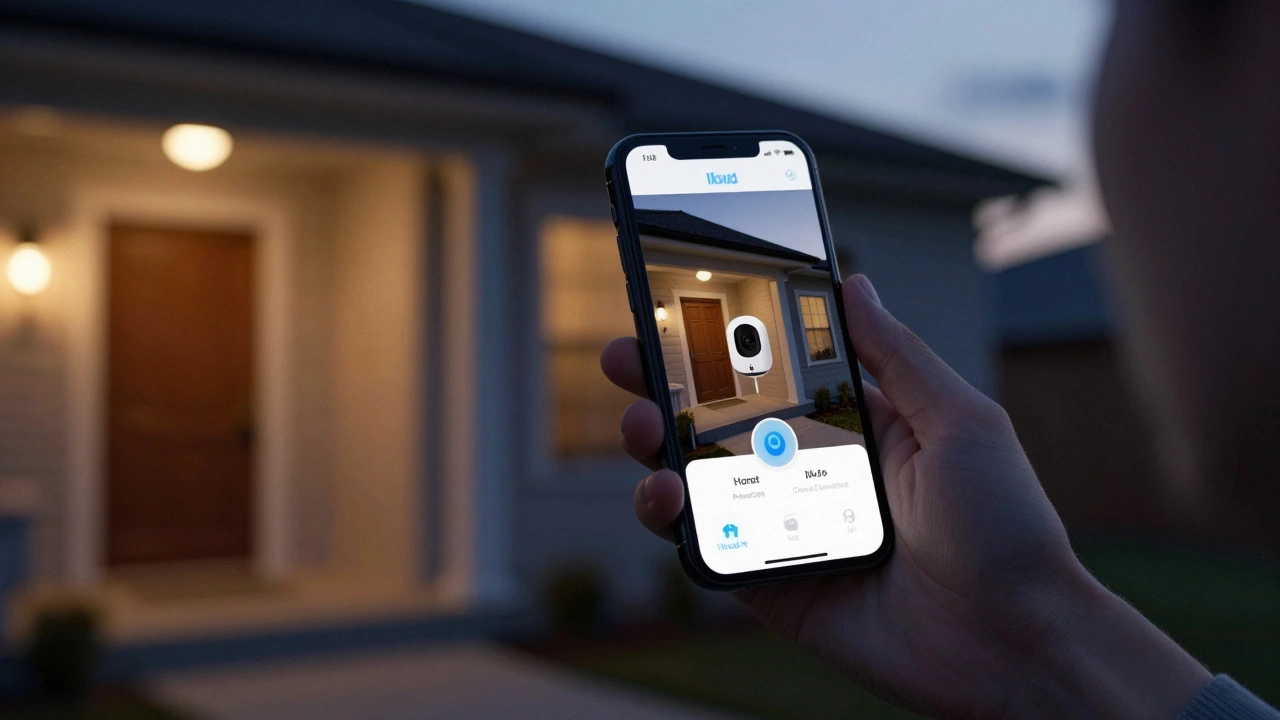
After setup, you can view live feed anytime-even when you’re away. Just open the Home app. No extra login, no separate app. If you have an Apple TV or HomePod mini, it acts as a hub so your camera stays online even when your iPhone isn’t home.
Cost? iCloud+ starts at $0.99/month for 50GB (covers one camera). Five cameras? $2.99/month. Unlimited? $9.99/month. That’s more than some third-party services, but you get military-grade encryption and no ads, no data mining, no third-party servers holding your footage.
Use the Camera Manufacturer’s App (Best for Features and Budget)
If you already own a camera from Ring, Arlo, Wyze, or Reolink, you probably already have their app. These apps often offer more features than HomeKit: person detection, custom motion zones, cloud storage plans, and even two-way talk with better audio quality.
Here’s what you need:
- Your camera’s app downloaded from the App Store (e.g., Ring, Arlo, Wyze, Reolink)
- An account created with that brand (usually free)
- Initial setup on the same Wi-Fi as your camera
Setup steps vary slightly by brand, but here’s the general flow:
- Plug in your camera and power it on.
- Open the manufacturer’s app and tap Add Device.
- Follow in-app instructions to connect the camera to your Wi-Fi (2.4GHz or dual-band).
- Wait for confirmation-it usually takes 3-8 minutes.
- Once connected, you can view live feed, check recordings, and adjust settings.
Wyze and Eufy offer free cloud storage with 12-second event clips. For continuous recording, Wyze charges $1.99/month per camera. Reolink and Arlo charge $3-$5/month for 24/7 cloud storage. But here’s the catch: these apps often drain your iPhone’s battery faster than HomeKit. PC Magazine’s 2025 test found third-party apps use 18% more battery during live viewing.
Also, many of these apps have had security flaws. In a DEF CON 33 presentation, researcher Riana Ferro found 78% of non-HomeKit camera apps had medium-to-high severity vulnerabilities. That doesn’t mean they’re all unsafe-but it does mean you’re trusting more companies with your video data.
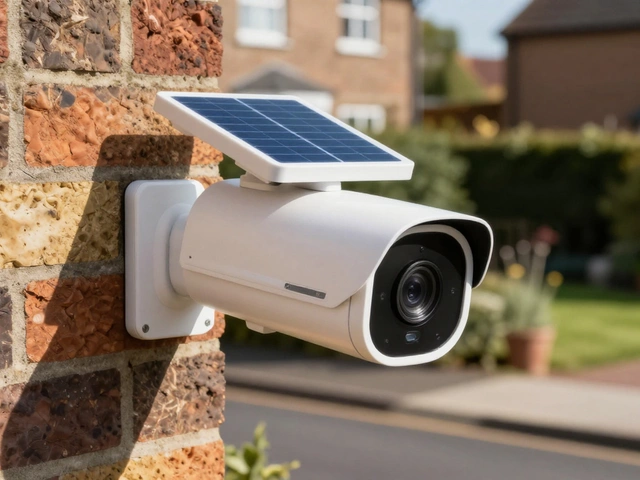
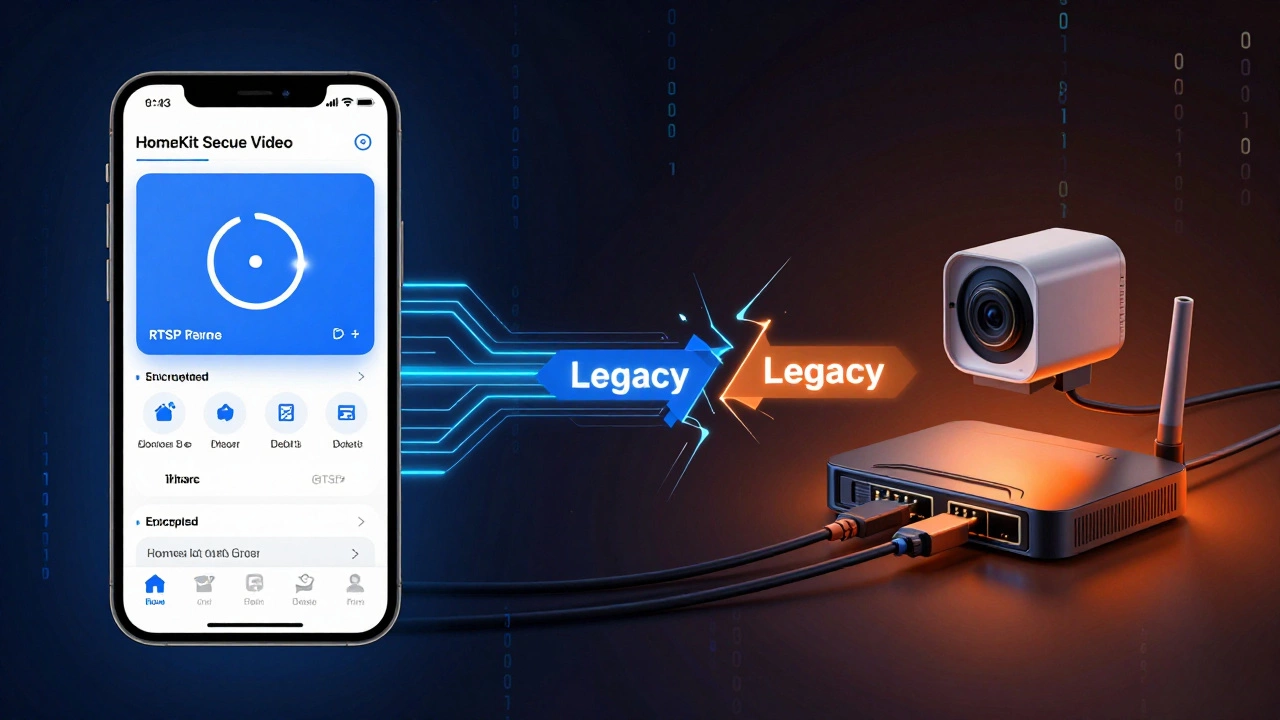
Use a Third-Party Aggregator App (Best for Old or Non-HomeKit Cameras)
Got an old IP camera from Hikvision, Dahua, or Amcrest? Or maybe you bought a camera before HomeKit was a thing? You can still watch it on your iPhone using apps like IPCams or TinyCam Monitor.
These apps support over 2,300 camera models, including older ones that don’t have official apps. They work by connecting directly to your camera’s IP address or RTSP stream.
Requirements:
- Your camera must support RTSP or ONVIF protocol (check the manual or manufacturer’s site)
- Port forwarding set up on your router (advanced, but doable)
- IPCams app ($3.99 one-time fee) or TinyCam (free with ads, $5.99 for Pro)
Setup is more technical:
- Find your camera’s IP address (usually in its settings or router admin page).
- Enable RTSP streaming on the camera (often under Network > Streaming).
- Open IPCams, tap Add Camera, then select RTSP.
- Enter the camera’s IP, port (usually 554), and username/password.
- Test the connection. If it works, you’ll see live video.
This method gives you total control-but no cloud backup, no motion alerts, and no encryption unless your camera supports it. It’s great for tech-savvy users or those with legacy gear. But if you’re just trying to check on your front porch, this is overkill.
What You Need to Make It Work (Network and Hardware Basics)
No matter which method you choose, your network matters. Most cameras need:
- 2.4GHz Wi-Fi (required for all models)
- Dual-band (2.4GHz + 5GHz) for 4K cameras
- At least 2 Mbps upload speed for 1080p streaming
- iPhone 6s or newer (iOS 12 or later)
Check your upload speed with Speedtest.net. If it’s below 2 Mbps, you’ll get choppy video or disconnections. If you’re using a 4K camera like the Aqara G5 Pro, you’ll need at least 8 Mbps upload. Most home internet plans have 10-50 Mbps upload-so you’re probably fine.
Also, your camera and iPhone must be on the same Wi-Fi network during initial setup. After that, remote viewing works over the internet. But if you can’t connect remotely, it’s usually because:
- Camera firmware is outdated (update it! 73% of issues are fixed this way)
- Router blocks UPnP (enable it in router settings)
- Apple’s HomeKit service is down (check apple.com/support for outages)
HomeKit vs. Third-Party: Quick Comparison
| Feature | HomeKit Secure Video | Manufacturer App | Third-Party App (e.g., IPCams) |
|---|---|---|---|
| Privacy | End-to-end encrypted, no cloud storage | Cloud storage, possible data sharing | Direct connection, no cloud (if self-hosted) |
| Cost | $0.99-$9.99/month (iCloud+) | Free to $5/month (cloud plans) | $3.99 one-time (IPCams) |
| Camera Compatibility | 147 certified models | Only your brand’s cameras | 2,300+ IP cameras |
| Setup Difficulty | Easy (scan QR code) | Easy (app-guided) | Hard (manual IP/RTSP config) |
| Battery Drain | Lowest (18% less than third-party) | Higher | Medium to high |
| Best For | Privacy-focused users, Apple ecosystem | Feature seekers, budget buyers | Old cameras, tech enthusiasts |
What’s New in 2026
Apple released iOS 17.3.1 on January 15, 2026, fixing a bug that caused some HomeKit cameras to show “No Response” after updates. If you’re having trouble, update your iPhone first.
Coming in iOS 18 (September 2026): Collaborative Camera Viewing. You’ll be able to share your camera feed with family members without them needing their own iCloud+ subscription. That’s huge for households.
Also, Matter 2.0 (launched December 2025) now supports security cameras. That means you can use a HomeKit camera on a Google Home or Amazon Echo-and still keep Apple’s encryption. Aqara and Eve are already certified.
Market trends show HomeKit cameras are growing fast. In 2023, they made up 22% of U.S. sales. By 2025, that jumped to 34%. Analysts predict over half of premium buyers will choose HomeKit by 2027.
Can I watch my security camera on iPhone without Wi-Fi?
No. Your iPhone needs an internet connection-Wi-Fi or cellular-to view the camera feed remotely. The camera also needs Wi-Fi to send video to the cloud or your home hub. You can’t view live video offline. But if your camera has local storage (like Eufy’s microSD card slot), you can review recordings later by connecting the camera to your iPhone via USB or Wi-Fi when you’re home.
Why does my HomeKit camera say ‘No Response’?
This usually happens after an iOS update or if your Home hub (Apple TV or HomePod) lost connection. First, restart your iPhone and the camera. Then check if your Apple TV or HomePod is online. If the problem persists, update your camera’s firmware. Apple confirmed in January 2026 that this affects about 0.8% of users on iOS 17.3, and the fix is in iOS 17.3.1. If you’re still stuck, remove the camera from the Home app and re-add it.
Do I need iCloud+ for HomeKit cameras?
Yes. HomeKit Secure Video requires an iCloud+ subscription. The 50GB plan ($0.99/month) supports one camera. You can add up to five cameras on the 200GB plan ($2.99/month), and unlimited cameras on the 2TB+ plan ($9.99/month). Without iCloud+, you’ll only see live video-you won’t get motion alerts or recorded clips.
Which is better: Eufy or Arlo for iPhone?
If you want HomeKit integration, go with Eufy. The SoloCam S340 offers 2K video, local storage via microSD, and full HomeKit support-all for $79.99. Arlo doesn’t support HomeKit Secure Video yet, so you’ll need their app, which uses cloud storage and costs extra. Eufy gives you more control and lower long-term costs. Arlo’s app has better motion detection, but Eufy’s privacy-first design wins for iPhone users who care about data security.
Can I use my iPhone as a security camera monitor without a camera?
No, you can’t use your iPhone as a monitor without a camera. But you can use an old iPhone as a camera. Download the Manything or Alfred app on the old phone, place it where you want to watch, and use your current iPhone to view the feed. It’s not ideal, but it works as a budget workaround if you don’t want to buy a new camera.
Next Steps: What to Do Today
Here’s your action plan:
- If you have a HomeKit camera: Open the Home app. Is it working? If not, update iOS and your camera firmware.
- If you have a non-HomeKit camera: Download its app. Test live view. If it’s slow or glitchy, check your upload speed.
- If you’re buying a new camera: Look for HomeKit Secure Video certification. Stick with Eufy, Aqara, or Logitech for the best balance of price, quality, and privacy.
- If you’re worried about cost: Start with Wyze or Eufy’s local storage models. Skip cloud subscriptions unless you need them.
Watching your security camera on your iPhone isn’t magic. It’s engineering-designed to work for you. Choose the method that matches your priorities: privacy, features, or cost. Once set up, you’ll have peace of mind in your pocket-no matter where you are.