Low-Light Surveillance: Keeping an Eye When the Lights Go Out
When working with low-light surveillance, the practice of monitoring areas that receive little or no ambient light. Also known as night‑time monitoring, it relies on special sensors and lighting techniques to capture clear video in darkness. For businesses and homeowners, this means you don’t have to sacrifice security after sunset. Crime rates tend to climb after dark, so a camera that can see in the black is often the difference between a thwarted intrusion and a costly break‑in. Modern systems combine smart software with hardware that can detect movement even when a streetlamp flickers or a hallway is pitch black. They also integrate with alarm panels and mobile alerts, so you get instant notifications the moment something moves in the shadows. Because the technology runs 24/7, you can maintain a constant watch without adding extra energy costs—most low‑light cameras draw only a few watts while delivering high‑resolution footage.
Key Technologies Behind Effective Low‑Light Surveillance
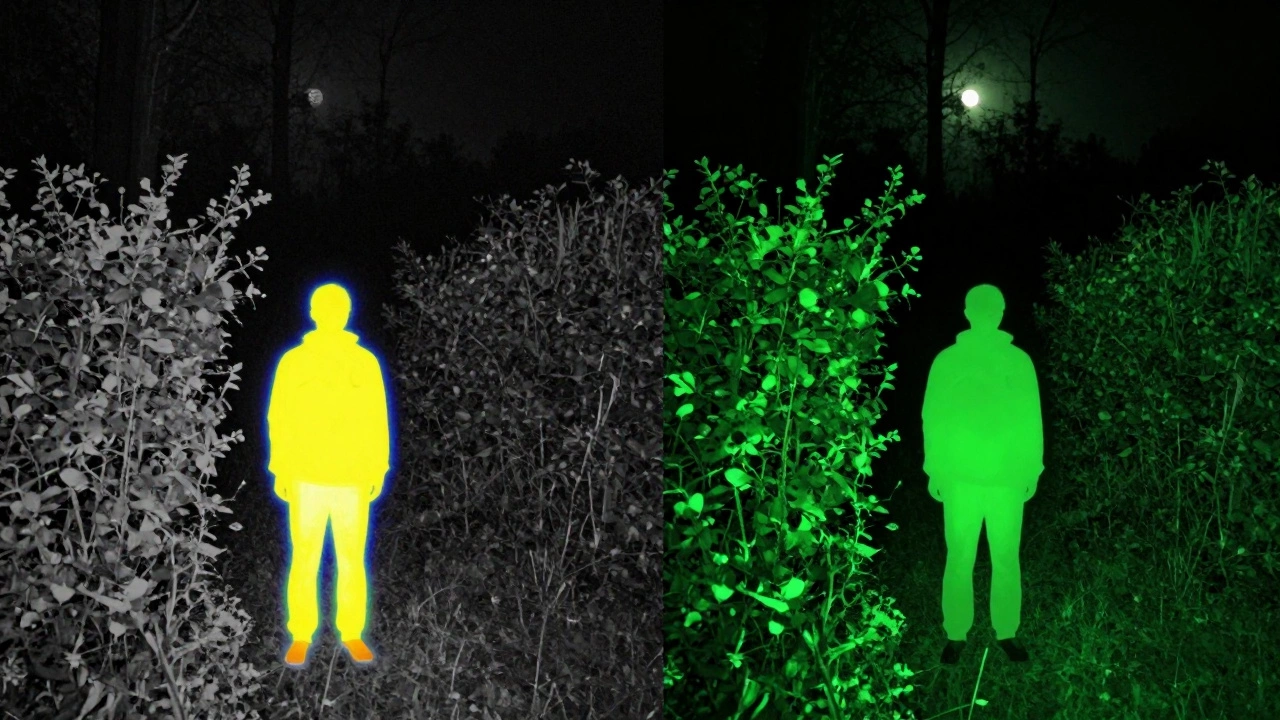
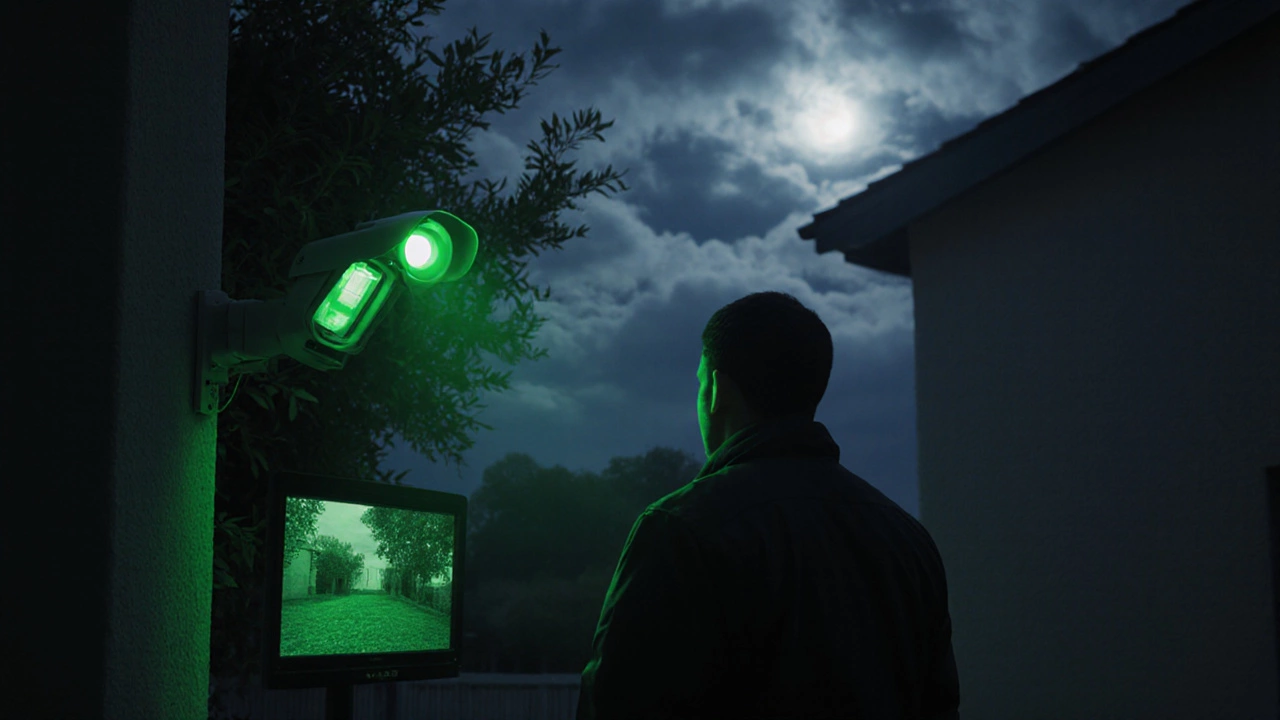
One of the core tools is night vision, a method that amplifies whatever tiny light is present, turning it into a visible image. It often pairs with infrared illumination, invisible IR LEDs that flood a scene with light the human eye can’t see but the camera sensor can capture.. When you need to see through fog or a blanket of heat, thermal imaging, sensors that detect temperature differences and create a picture based on heat signatures. Finally, low‑light cameras, devices built with larger pixels and back‑illuminated sensors to maximize the limited photons they receive. The relationship works like a chain: low‑light surveillance requires night vision, night vision benefits from infrared illumination, and infrared illumination enhances the performance of low‑light cameras. Thermal imaging adds the ability to see heat, which is useful when visible light is completely absent. Each technology brings trade‑offs—night‑vision can produce a green tint, infrared may reveal the camera’s position to savvy thieves, and thermal cameras are pricier but excel at spotting hidden intruders behind foliage. Choosing the right mix depends on the site, budget, and how much ambient light you already have.
Planning a low‑light system starts with a site audit: identify dark zones, check for existing outdoor security lighting, and determine where an infrared floodlight or a thermal sensor would have the most impact. Wiring considerations matter too; many modern cameras run on PoE (Power over Ethernet), which cuts down on extra cables and lets you place units farther from power sources. For DIY enthusiasts, there are plug‑and‑play wireless models that sync with a smartphone app, but they still need a stable Wi‑Fi link—something we cover in our guide on Wi‑Fi data usage. If privacy is a concern, offline cameras store footage on local SD cards and avoid cloud exposure altogether. No matter the approach, a well‑designed low‑light setup reduces blind spots, cuts false alarms, and gives you clear evidence when something does go wrong.
Whether you’re setting up a storefront, protecting a warehouse, or simply watching over a backyard, understanding how each piece fits lets you pick the right mix without overpaying. In the posts below you’ll find deep dives on Wi‑Fi camera data usage, outdoor lighting strategies, offline camera options, and step‑by‑step guides to connect everything to your phone. Armed with this context, you can quickly decide which low-light surveillance solution matches your budget and security goals, then move on to the detailed articles that walk you through installation, optimization, and troubleshooting.