Ever wonder what it takes to install one of those snazzy video doorbells? It's all about the wiring, my friend. Before you rush out to buy the latest and greatest doorbell cam, you need to understand what kind of wiring your home has—or if you'll need any at all! Let's break it down.
First off, check out your existing doorbell setup. If you've got a traditional doorbell, you're likely looking at a low-voltage wiring system. Most video doorbells are designed to work with these. But if your house is a bit more on the old school side and doesn't have any doorbell wiring, don't worry, there are wireless options too!
Not a fan of wires or not in the mood to call an electrician? That's cool. There are wireless video doorbells that run entirely on batteries. The trade-off is you’ll have to keep an eye on battery life—nothing worse than missing a delivery notification because your doorbell ran out of juice.
If you're set on a wired setup, make sure your transformer can handle the power requirements of the video doorbell. Generally, you need something that provides between 16V-24V. If the numbers aren't adding up, it might be upgrade time for the transformer. Just remember, a little extra effort now can save you a ton of headaches later.
- Understanding Doorbell Wiring Basics
- Choosing Between Wired and Wireless Models
- Installation Tips and Tricks
- Troubleshooting Common Wiring Issues
Understanding Doorbell Wiring Basics
Alright, let's get into the nitty-gritty of doorbell wiring. If you're eyeing a video doorbell, you've got to know the basics of how these things get power. It's not rocket science, but a little know-how goes a long way.
Low-Voltage Systems
The most common setup for doorbell wiring is a low-voltage system, usually clocking in around 16 volts. Why low voltage? It's safe and gets the job done without juicing up your electric bill. Most traditional and even some of the best video doorbells run on this type of power.
Here's how it works: Your doorbell system connects to a transformer that steps down your household voltage (usually 120V) to that safe 16-24V range. This little gizmo is typically tucked away in your basement or closet, so don't be shocked if you don't see it right next to your doorbell.
Checking Your Current Setup
Before you install a new video doorbell, figure out what you're working with. Take a peek at the existing doorbell and transformer. Is it there? Is it old and dusty? Run a quick test with a multimeter if you're tech-savvy, or just call in a pro.
Some of the newer smart doorbells need a bit more juice. So, your transformer might need an upgrade. It's like swapping an old phone charger for one with fast charging.
No Existing Wiring?
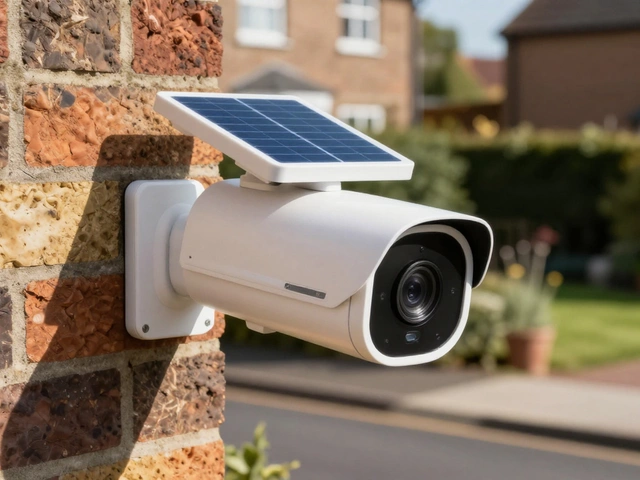
If your house has no wiring, don't fret. You can go with a battery-powered or even solar-powered doorbell. These are easy to set up and perfect for situations where wiring is a nightmare—or nonexistent.
Quick Tips
- Check compatibility: Not all video doorbells work with all types of transformers. Double-check the specs before purchasing.
- Label your wires: If you're messing with wires, label them! You'll thank yourself when everything goes back together.
- Don’t exceed voltage: Stick with what's recommended. Overvoltage can fry your gadgets, and nobody wants smoke signals from their doorbell.
Keep these pointers in mind, and you'll be the DIY hero of the neighborhood, with a smart doorbell to boot!
Choosing Between Wired and Wireless Models
So, you're torn between a wired and a wireless video doorbell? Let's weigh the options. Both types come with their own set of perks and quirks, so the right choice depends on your home setup and personal preferences.
Wired Video Doorbells
If you've got existing doorbell wiring, going for a wired model can be pretty straightforward. Wired video doorbells typically offer more reliability since they're constantly powered, eliminating the need to charge batteries. This constant power also means they can offer more features like continuous recording and advanced motion detection.
The downside? Installation might be a bit more challenging—especially if you're dealing with old or incompatible wiring. And let’s face it, who really wants to be an electrician on their day off? But if you're cool with DIY projects or calling in an expert, a wired doorbell is a solid option.
| Feature | Wired Models | Wireless Models |
|---|---|---|
| Power Source | Home Electrical System | Rechargeable Batteries |
| Installation Difficulty | Medium to High | Low |
| Reliability | High, Continuous Power | Varies, Battery Dependent |
Wireless Video Doorbells
On the flip side, wireless video doorbells are all about convenience. They run on rechargeable batteries, so you don't have to fuss over wiring. Installation is a breeze—just mount the doorbell using screws or adhesive, and you're good to go.
However, keep in mind that wireless models require you to keep track of battery life. Depending on usage, you might find yourself recharging every few months. Plus, some wireless models might have fewer features compared to their wired counterparts due to power limitations.
Making the Right Choice
Consider your home’s existing setup and how hands-on you want to be. Got wiring and don’t mind a bit of elbow grease? Wired could be your thing. Prefer ease and flexibility? A wireless model might just win you over.
Pro Tip: Some brands offer hybrid models that give you the best of both worlds—wired capability with battery backup. It pays to do a little research and maybe even jot down a pros and cons list specific to your needs. Either way, a new video doorbell is going to enhance your home security experience.

Installation Tips and Tricks
Getting a video doorbell set up is easier than you might think, especially if you know a few handy tricks. Let's get you wired (or unwired) up!
Gather Your Tools
First things first, gather all the stuff you’ll need. That usually includes a drill (if you’re going into a brick or stone wall), a screwdriver, the mounting bracket that came with your doorbell, and some anchors if you're working with surfaces like plaster or masonry. Don’t forget a ladder if the doorbell spot is high up.
Prepping Your Area
Before you drill any holes, make sure you've picked the perfect spot. Stand at your door and look around—your doorbell camera should cover the most area possible, like the walkway and front yard. Also, consider the glare of the sun; mounting it under a porch or an overhang might help.
Wired Doorbell Installation
- Turn Off Power: Trust me, you don’t want a shock. Find the breaker and flip it off.
- Mount the Bracket: Use the wall anchors and screws to attach the bracket.
- Connect Wires: Match the wires from the electrical box to the doorbell, usually by using the wire nuts provided.
- Attach the Doorbell: Once it’s wired, hook the doorbell unit onto the bracket.
When you're done, turn the breaker back on and check if it's working!
Wireless Doorbell Installation
If you’ve chosen a wireless smart doorbell, it's even simpler. Just use the mounting bracket to secure the doorbell itself to the wall or doorframe. A quick charge or battery insertion and you're all set!
Troubleshooting Installation Issues
- If your home security device isn’t powering on, double-check the transformer power settings.
- Experiencing choppy video? It might be time to upgrade your Wi-Fi or move the router closer.
Finally, some options come with apps that guide you through installation with visual aids and step-by-step instructions. They’re a lifesaver if you hit a snag. Happy installation!
Troubleshooting Common Wiring Issues
So, you've set up your new video doorbells, and they're not working as expected? Let's dive into some common wiring issues and how to fix them.
Voltage Problems
If your smart doorbell isn't powering on, the transformer might not be delivering enough juice. Most video doorbells need 16V-24V to work their magic. Grab a multimeter and check the voltage at the doorbell and at the transformer. If it's lower than it should be, consider upgrading the transformer.
Loose Connections
A lot of wiring issues stem from loose connections. Make sure those wires—especially the ones at the doorbell and the chime—are snug and secure. Tighten them up if you notice any wobble, and double-check they're in the right spots.
Interference Issues
Installing doorbells near heavy electronic appliances? Be wary of interference from Wi-Fi and other gadgets. Sometimes, everything else seems fine, but external interference throws your doorbell wiring out of whack.
Check for Corrosion
Over time, wires and connectors can corrode, especially if exposed to the elements. Give your connections a look-over. If they look rusty or gray instead of shiny copper, it might be time to swap them out.
Non-Working Dings and Chimes
If your doorbell cam works but the chime doesn't ring, the issue might be between your transformer and the chime unit. Ensure there's no break in the wire and that it's properly connected.
Testing the Circuit
If you've gone through these steps and no luck yet, test the circuit with a multimeter. A reading of zero across any section means a break. Time to patch things up or replace that section.
| Issue | Possible Cause | Solution |
|---|---|---|
| Video Doorbell Not Charging | Insufficient Voltage | Check transformer voltage; upgrade if needed. |
| Chime Not Ringing | Wiring Error | Ensure correct and tight connections. |
| Interrupted Wi-Fi Connection | Interference | Reposition router or change Wi-Fi channel. |
With a little patience and these tips, your video doorbell issues should be sorted. Still no joy? It might be time to call in the pros!