You want a straight answer before you buy or start drilling: do smart doorbells actually need wiring? Short answer: not always. Most models come in two flavours-wired and battery-powered-and many can run either way with an adapter. The right choice depends on your door, Wi‑Fi, and whether you’ve already got a doorbell transformer and chime.
Here’s the quick payoff you’re after, with no fluff:
- TL;DR: Battery models don’t need wiring and take 10-20 minutes to fit; wired models need low‑voltage doorbell wiring (usually 8-24V AC) and are more reliable long term.
- Best reliability and latency: wired. Easiest install in a rental: battery or plug‑in adapter.
- If you already have a working wired chime and transformer, a wired video doorbell is usually the cleanest upgrade.
- No existing wires? Use battery, a plug‑in power adapter, or go pro with PoE (for some brands).
- UK specifics: doorbell transformers are 8-12V or 12-24V AC; work within BS 7671; don’t touch mains/consumer unit unless you’re qualified.
I’ve installed and tested dozens across UK flats and semis here in Bristol. Below, I’ll help you choose, install, and avoid the gotchas.
The short answer, and how to pick the right power option
Smart doorbells come in three power paths:
- Battery-only: No wiring required. You screw the plate on, connect to Wi‑Fi, and go. You recharge every few months.
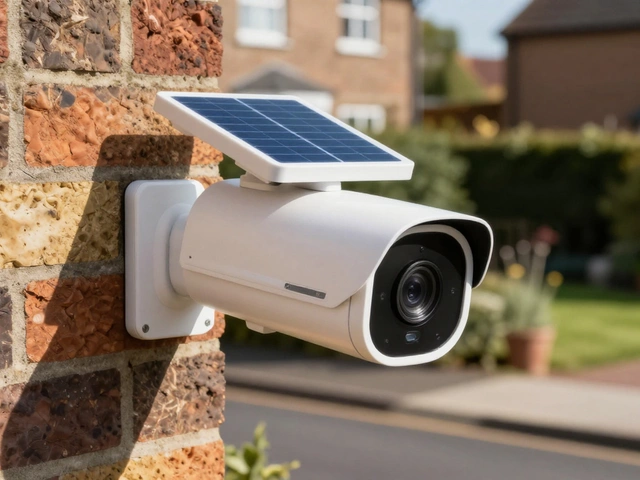
- Wired (low-voltage): Connects to existing doorbell wires powered by a transformer (typically 8-24V AC, 10-30VA). Great for always-on power, minimal maintenance.
- Hybrid: Battery-capable but can also be trickle‑charged via a plug‑in adapter or existing doorbell wiring.
What problem are you actually trying to solve? These are the real jobs-to-be-done most people have when they search this:
- Know if you can avoid wiring altogether.
- Decide between wired and battery based on reliability, cost, and effort.
- Understand UK voltage and chime compatibility (transformers, 8-24V AC, digital vs mechanical chimes).
- Follow a simple install plan for your situation (existing wires vs none).
- Prevent headaches: poor Wi‑Fi, flat batteries, or dead chimes.
Here’s a simple decision guide you can use in 30 seconds:
- Do you have an existing working doorbell that dings a chime indoors? Yes → you likely have a transformer and low‑voltage wires you can reuse. Choose a wired model (or a hybrid run wired). No → go to step 2.
- Are you renting or don’t want to drill near mains? Choose battery or a plug‑in adapter model. Done.
- Do you want near-zero delay and never to charge? Wired is best. If you’re running Ethernet anyway, consider PoE models (DoorBird, Ubiquiti, some Hikvision/Uniview).
Reliability rule of thumb from real-world use: wired doorbells have fewer missed events and faster wake times because they don’t sleep to save power. Battery models have improved a lot, but heavy motion or winter cold will make you charge more often. The truth about smart doorbell wiring is simple: it’s not mandatory, but it’s still the gold standard if you can do it safely.
| Power option | Needs wiring? | Typical UK voltage/spec | Install time | Reliability/latency | Running cost | Notes |
|---|---|---|---|---|---|---|
| Battery-only | No | - | 10-20 min | Good; can miss 1-2s vs wired in some cases | £0 (charging) or £15-£30/yr if using solar/extra battery | Charge every 2-6 months (usage dependent) |
| Wired (AC transformer) | Yes (low-voltage) | 8-24V AC, 10-30VA, 50 Hz | 30-90 min (re-using wires) | Best; fast wake, consistent | 1-3W idle (~£3-£8/yr at 30p/kWh) | Works with many chimes; follow brand’s kit/diode rules |
| Plug‑in adapter (to hybrid/battery unit) | No fixed wiring; cable to door | Manufacturer’s DC (e.g., 5-24V DC) | 20-40 min | Very good; near wired | 1-3W via adapter | Neat if you can route cable indoors |
| PoE (Ethernet) | Yes (Ethernet run) | IEEE 802.3af/at via Cat5e/Cat6 | 60-180 min (new cable) | Best; power + data on one cable | 1-4W | Usually part of NVR/UniFi setup; pro‑leaning |
Sources for specs: manufacturer installation manuals (Ring, Google Nest, Eufy, Ubiquiti Doorbell G4/G5, DoorBird), UK BS 7671 (18th Edition) for wiring practices, and Ofgem domestic electricity price caps for cost estimates.
Install paths: no wires, existing wires, and pro options
Pick your scenario and follow the steps.
Scenario A: No existing doorbell wiring (most UK flats and many newer builds)
Best options: battery-only or hybrid with plug‑in power.
- Check your Wi‑Fi at the door. Aim for -60 dBm or better on 2.4 GHz (your phone’s Wi‑Fi analyser app can show this). If it’s worse than -70 dBm, expect lag or drops-solve this first with a mesh node near the hall.
- Mark the mount. Hold the bracket where you want it. Avoid metal frames if you can; they can block signal and make drilling miserable. If you have UPVC, use the right screws and avoid hitting the steel reinforcement.
- Weather check. UK rain + wind means you want at least IP54. Angle wedges help keep the lens dry and the view across the path rather than straight out to the street.
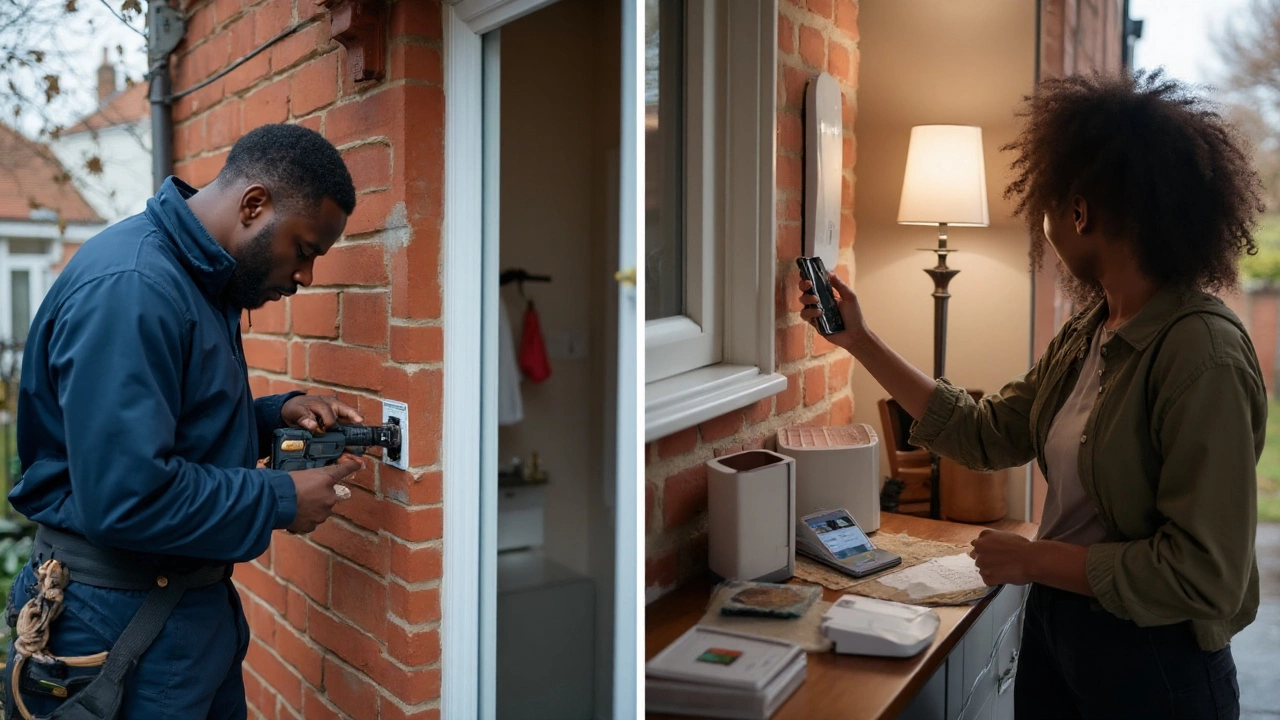
- Battery route: charge fully before first use. Fit the bracket, clip the doorbell, pair to the app, set motion zones, and dial back sensitivity so cars don’t ping you all day.
- Plug‑in route: run the supplied DC cable inside to a socket. Use cable clips and tidy it-don’t trap it in the door. Power on, pair, and test.
Pros: zero electrician, zero mains touching, quick win. Cons: battery models need charging; plug‑in cables need tidying and a nearby socket.
Scenario B: You have a ding-dong chime indoors that works (classic UK setup)
Best options: wired doorbell or a hybrid run from the existing transformer.
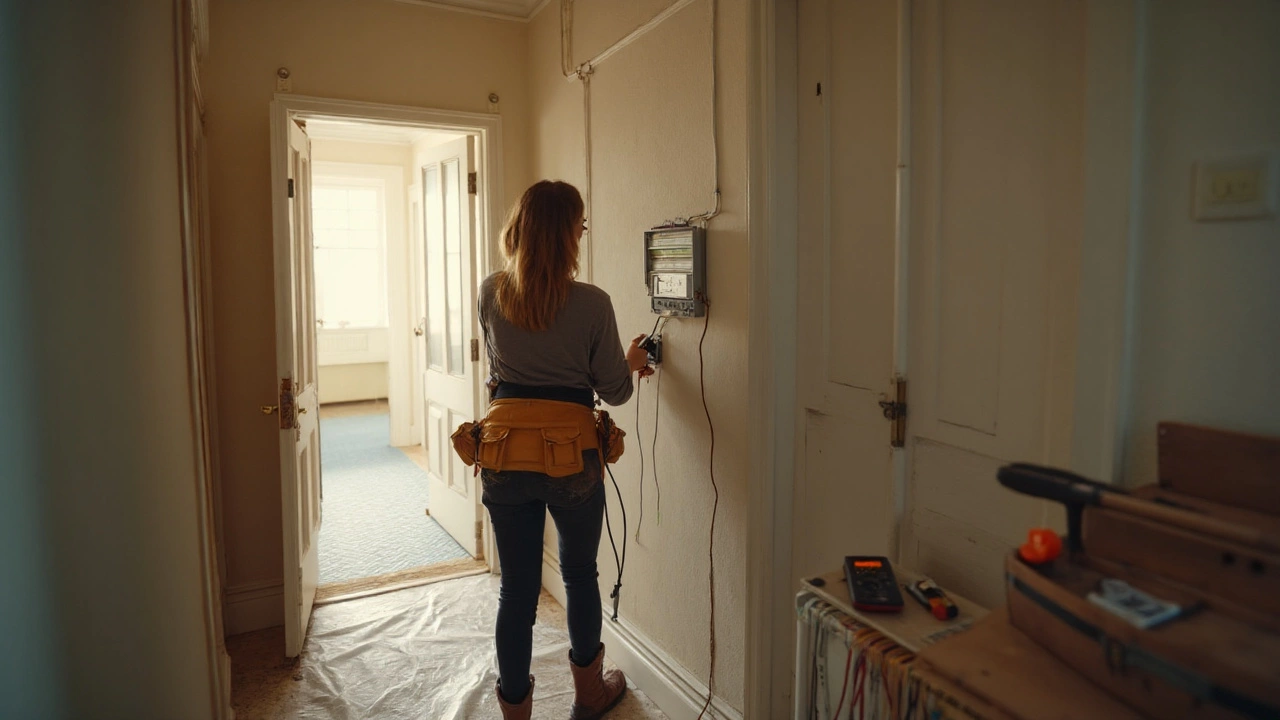
- Safety first: turn off power to the doorbell transformer circuit. The transformer is often in/near the consumer unit, chime box, or a junction box. Even though it’s low voltage at the door, the primary side is mains.
- Check the transformer spec. You want 8-24V AC, ideally 16-24V AC with 10-30 VA capacity (many video doorbells list a minimum VA). If yours is older (8V 5-8VA) it may be underpowered for video units.
- Check chime compatibility. Mechanical (ding-dong) and digital chimes behave differently. Brands like Ring include or require a “Pro Power Kit” or “chime bypass”; Nest and others have their own notes. Read the specific wiring diagram in the manual for your model.
- Mount and wire. Reuse the two low‑voltage wires at the door. Polarity doesn’t matter for AC. If your model calls for a diode across chime terminals or a bypass module, fit it as shown.
- Power up and test. Confirm the doorbell rings in-app and (if supported) your existing chime. If the chime buzzes or is weak, your transformer is probably undersized-upgrade to a 16-24V AC 30VA unit. Replacing a transformer is notifiable only if it involves creating a new circuit or work in special locations; in general, like‑for‑like accessory swaps outside special locations are non-notifiable under Part P, but if in doubt, use a qualified electrician.
Pros: no batteries to charge, instant wake, works with a proper chime. Cons: more steps; transformer/chime quirks if you mismatch parts.
Scenario C: You want pro‑grade reliability or you already have Ethernet at the door
Best option: Power over Ethernet (PoE) video doorbell (e.g., Ubiquiti UniFi Protect G4/G5 Doorbell, DoorBird, some Hikvision models).
- Run Cat5e/Cat6 from your switch (PoE) to the door position. Use an external grade cable if outdoors and follow safe routing practices.
- Mount, crimp/terminate, and connect to the PoE switch or injector (802.3af/at).
- Adopt into your NVR/software (UniFi Protect, NVR, or vendor app). Configure motion zones and notifications.
Pros: one cable for power and data, best latency, no Wi‑Fi issues. Cons: model choice is narrower; you need to be comfortable with networking or hire a pro.
UK note: Any work on fixed wiring that touches mains side (e.g., installing a new transformer circuit) falls under BS 7671 and Part P. Low‑voltage bell wire on the secondary side is generally simple DIY, but if you’re unsure, get an electrician. The goal is safe, not clever.

Specs, pitfalls, UK rules, comparisons, and your quick checklist
Here are the small details that make a big difference.
Voltage and transformers (UK)
- Most wired video doorbells want 8-24V AC at 50 Hz, minimum 10-30 VA. Manufacturers publish exact ranges; always check your model’s sheet. Examples from 2025 manuals: Google Nest Doorbell (wired): 16-24V AC, 10-40VA; Ring Wired/Pro lines: 16-24V AC, 30VA recommended; Eufy wired variants: commonly 16-24V AC, 30VA recommended.
- DC vs AC: Don’t feed AC‑only doorbells with DC from a random adapter. If your model is hybrid and accepts DC, use the maker’s adapter.
- Undersized transformer symptoms: chime buzzes, doorbell reboots, night IR cuts out. Fix: upgrade to the recommended VA.
Chimes: mechanical vs digital
- Mechanical chimes (metal striker) are simple and often supported. Some brands require a small “power kit” at the chime to protect it.
- Digital chimes (electronic sounders) can need special wiring or may not be supported; many people bypass the chime and use a wireless plug‑in chime or smart speakers (Alexa/Google) instead.
- If your chime is ancient or incompatible, you can either bypass it or fit a new compatible chime as per the brand’s instructions.
Wi‑Fi and notification speed
- 2.4 GHz goes further through walls than 5 GHz and is often the only band many doorbells use. Aim for -60 dBm or better at the door location. A mesh node in the hall often fixes lag.
- Interference culprits: metal frames, foil-backed insulation, thick stone walls. A wedge mount can sometimes angle the unit away from a metal frame to help signal.
- PoE avoids Wi‑Fi entirely and is unmatched for reliability if you can run the cable.
Battery life reality (UK climate)
- Typical claims: 2-6 months per charge with 10-20 events/day. Cold snaps can shave 20-40% off capacity. Expect shorter life in a busy street-facing spot.
- Extend life: narrow motion zones to your path, turn off “all motion” and use “people only” if available, and reduce pre‑roll/advanced HDR unless you need it.
- Solar add‑ons help only if the door gets a few hours of direct light. North-facing UK doors in winter won’t see much gain.
Privacy and law (UK)
- If your camera captures beyond your property (pavement, neighbour’s drive), UK ICO guidance says you should be transparent-signage helps-and you must handle footage responsibly (only keep what you need, secure it, respond to subject access requests if applicable).
- Audio: many doorbells record audio. If that’s sensitive where you live, disable audio recording in settings.
Costs you can expect (2025 UK)
- Battery model: £80-£250 depending on brand/resolution; no install cost.
- Wired model reusing existing wires: DIY £0; electrician to fit/upgrade transformer/chime £80-£200 in most cases.
- PoE model: £180-£400 for the unit; cable and PoE switch/injector extra; pro install varies with cable route.
Common pitfalls to avoid
- Buying a wired-only doorbell when you have no transformer. You’ll be stuck until one is installed.
- Assuming your old 8V 5VA transformer can power a modern video unit-it rarely can.
- Mounting on a metal door without a wedge-Wi‑Fi gets clobbered, and motion detection faces the road, not your path.
- Using the wrong diode/power kit or skipping it entirely-this kills chimes.
- Not planning cable management for plug‑in adapters-dangling cables get yanked and look messy.
Quick checklist (print-and-do)
- Decide: battery, wired, plug‑in, or PoE.
- Measure Wi‑Fi at the door (target -60 dBm).
- If wired: confirm transformer 16-24V AC, 10-30VA. Upgrade if weak.
- Check chime type and brand’s wiring diagram (power kit/diode?).
- Pick a mount height (~1.2-1.4 m) and wedge angle to see faces, not sky.
- Set motion zones to your path; “people only” if available.
- Test notifications for speed and reliability before sealing holes.
Mini‑FAQ
- Do smart doorbells require wiring? No. Battery models don’t. Wired models do. Hybrids can do either.
- Can I use my existing chime? Often yes, with the brand’s power kit. Some digital chimes aren’t supported. Many people switch to a wireless plug‑in chime or smart speaker instead.
- What voltage do I need in the UK? Most wired units want 16-24V AC, 10-30VA. Check your exact model’s manual.
- Can I power it from a plug‑in adapter? If the brand sells one or lists a compatible DC input, yes. Don’t improvise with random adapters.
- Do I need an electrician? If you’re touching mains/transformer on the primary side or adding a new circuit, get a qualified electrician. Low‑voltage secondary wiring at the door is typical DIY.
- What about winter battery life? Expect a 20-40% drop in cold weather. Charge indoors to a full 100% before re‑mounting.
- Is PoE worth it? If you have Ethernet or plan to, yes-best reliability and no Wi‑Fi worries. Model selection is more “prosumer.”
Next steps and troubleshooting
- If you’re a renter: choose a battery model or hybrid with a plug‑in adapter and command strips for the chime. Keep the original door hardware safe for move‑out.
- If you’re in a busy street: use narrower motion zones and “people only” detection. Raise the mount a touch and angle inward to avoid constant traffic alerts.
- If notifications are slow: check Wi‑Fi strength; move a mesh node closer; switch off bandwidth‑heavy features (max HDR, 24/7 pre‑roll) to reduce wake time on battery models.
- If the chime hums or doesn’t ring: confirm transformer VA; install the brand’s power kit; ensure any required diode is in the right orientation (for models that need it).
- If night video is poor: wipe the lens (rain spots flare IR), angle away from bright street lights, and avoid mounting flush to shiny frames that reflect IR.
- If the unit reboots randomly: suspect under‑voltage, a tired transformer, or a loose connection at the terminals. Tighten screws and upgrade transformer if needed.
If you’ve got an old ding‑dong chime that’s still going, a wired upgrade is usually your best value move. If you’re starting from nothing, battery or a clean plug‑in adapter keeps things simple and safe. And if you’re building out a proper system with Ethernet, PoE doorbells are brilliant-power and data over one cable, rock‑solid in any Bristol winter.