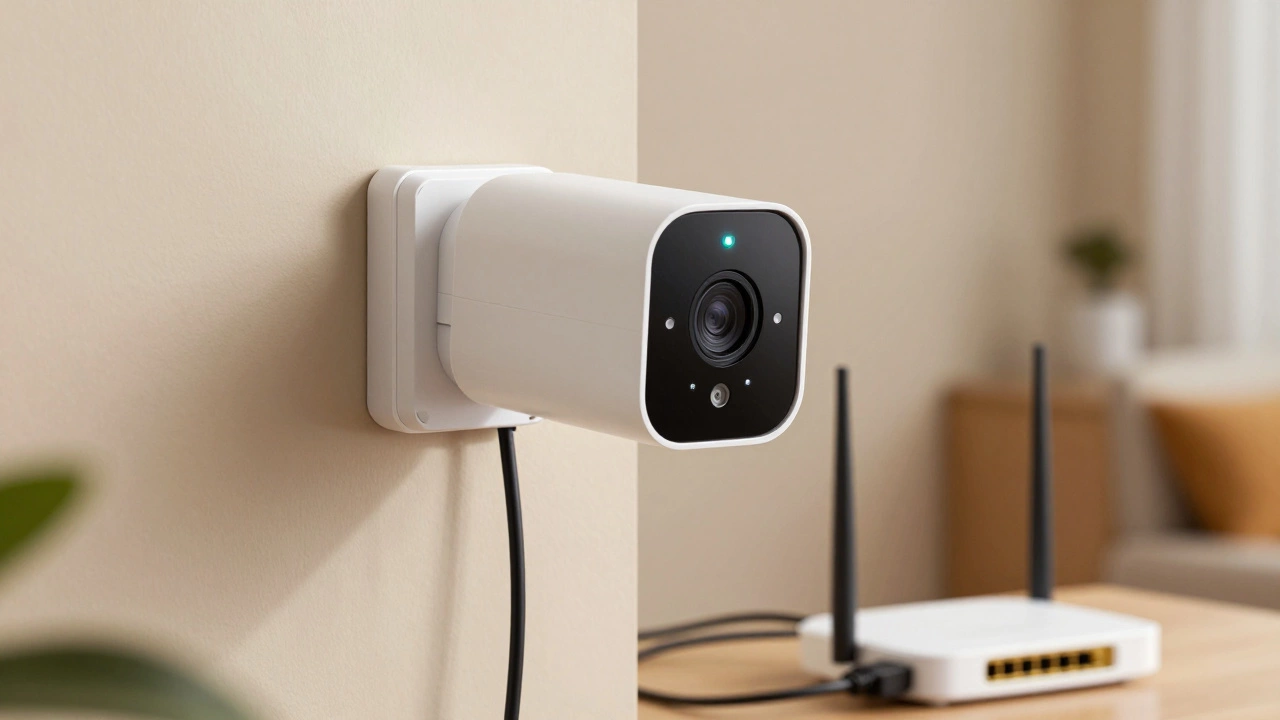
Connecting a CCTV camera wirelessly isn’t as complicated as it sounds-especially if you know what tools you need and what to expect. Many people assume "wireless" means no wires at all, but that’s not quite right. Most wireless CCTV cameras still need a power cable. What’s wireless is the video signal. Instead of running Ethernet cables from your camera to a recorder, the camera sends footage over Wi-Fi or cellular networks. This makes installation faster, cleaner, and way more flexible-perfect for renters, homeowners with older houses, or businesses that don’t want to drill through walls.
What You Actually Need to Get Started
Before you start plugging things in, make sure you’ve got the right gear. A basic wireless CCTV kit includes:- A wireless IP camera (with built-in Wi-Fi radio)
- A power adapter (usually 12V DC)
- An Ethernet cable (for initial setup)
- A router (2.4GHz Wi-Fi network required)
- A computer (Windows is easiest, but Mac works too)
- A DVR or NVR (optional if using cloud storage)
Some kits come with a plug-and-play NVR that pairs automatically with cameras. These are great for beginners. If you’re using a standalone camera, you’ll need to manually configure it through a web browser.
Step 1: Power Up and Connect with Ethernet
Even though you want a wireless setup, you have to start with a wired connection. This is how the camera learns your network.- Plug the camera into a power outlet using the 12V DC adapter.
- Connect one end of the Ethernet cable to the camera’s LAN port.
- Plug the other end into your router or a network switch.
- Wait about 60 seconds. The camera will boot up-look for a blinking LED light to confirm it’s alive.
Don’t skip this step. Trying to set up Wi-Fi without a wired connection first is like trying to teach someone to drive without letting them sit in the car first.
Step 2: Find the Camera’s IP Address
Now you need to talk to the camera. Most cameras come with a default IP address like 192.168.1.109. But if you’re not sure, use a free tool called ConfigTool (provided by most manufacturers). Download it on your computer, open it, and it’ll scan your network and show you the camera’s IP.If you don’t have ConfigTool, open Command Prompt (Windows) or Terminal (Mac), type arp -a, and look for a device with a name like "IPCamera" or the brand name. That’s your camera.
Step 3: Log Into the Camera’s Web Interface
Open any web browser-Chrome, Edge, Firefox-and type the camera’s IP address into the address bar. Press Enter.You’ll be asked for a username and password. Check the label on the camera or the manual. Default logins are often:
- Username: admin
- Password: admin or 123456
If those don’t work, search for your camera model + "default login" online. Never leave the default password after setup-change it immediately.
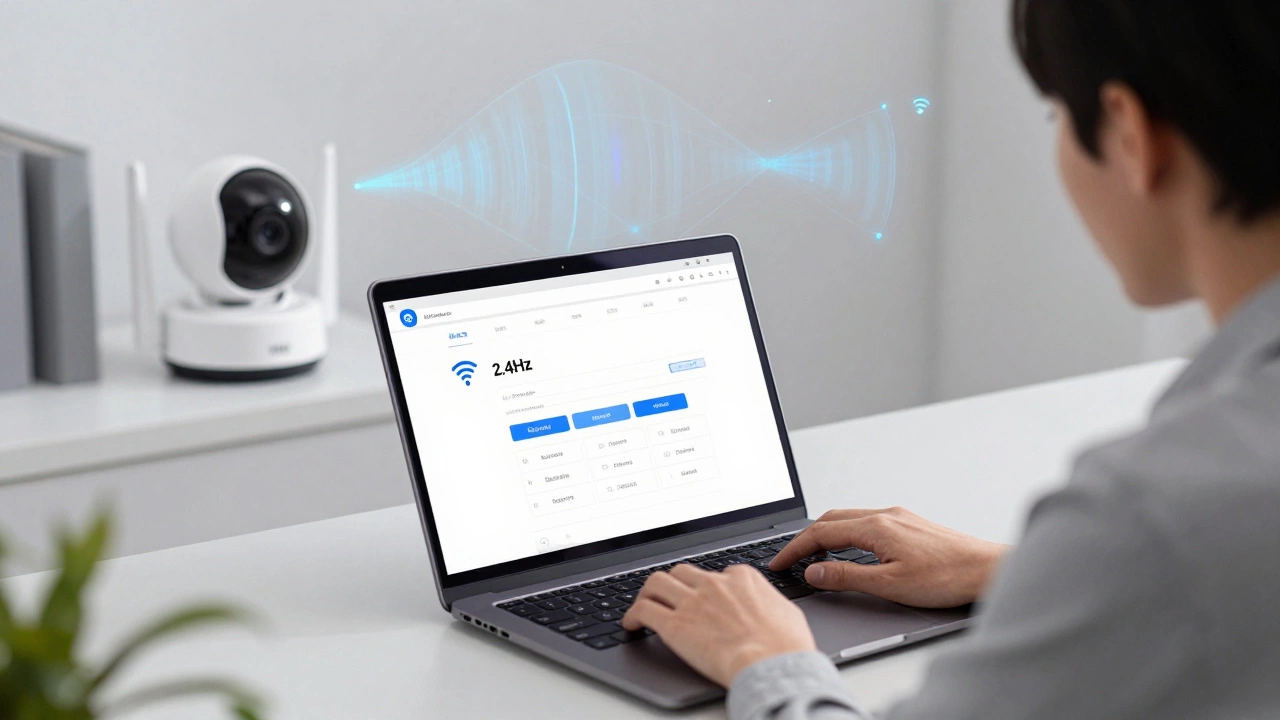
Step 4: Switch from Wired to Wireless
Once logged in, go to the Network Settings menu. Look for a tab called WiFi or Wireless.Here’s where you make the switch:
- Select "Wireless" as the connection type.
- Click "Scan" to find nearby Wi-Fi networks.
- Choose your 2.4GHz network (yes, 2.4GHz-not 5GHz). Most cameras don’t support 5GHz.
- Enter your Wi-Fi password.
- Set IP assignment to "DHCP" (this lets your router assign an address automatically).
- Click "Save" or "Apply".
The camera will reboot. During this time, it drops the Ethernet connection and tries to connect wirelessly. Wait 1-2 minutes.
Step 5: Confirm the Connection
After reboot, go back to ConfigTool or your router’s admin page (usually 192.168.1.1). Look for the camera’s name in the list of connected devices. If it shows up, you’re done!Unplug the Ethernet cable. The camera should keep streaming over Wi-Fi. Test it by viewing live footage on your phone using the manufacturer’s app.
What If Your Wi-Fi Signal Is Weak?
This is the most common problem. A weak signal means blurry video, lag, or dropped connections.Before installing the camera, do a quick signal test:
- Take your phone to the spot where you plan to mount the camera.
- Check the Wi-Fi signal bars. If it’s below 3/5, you’ve got a problem.
- Use a Wi-Fi analyzer app (like NetSpot or Wi-Fi Analyzer) to see the exact signal strength in dBm. Anything above -70 dBm is good. Below -80 dBm? You need a fix.
Solutions:
- Move your router closer.
- Use a Wi-Fi extender (but avoid mesh systems unless all nodes are on the same subnet).
- Install a dedicated outdoor access point (like TP-Link CPE210) if the camera is over 100 feet from the router.
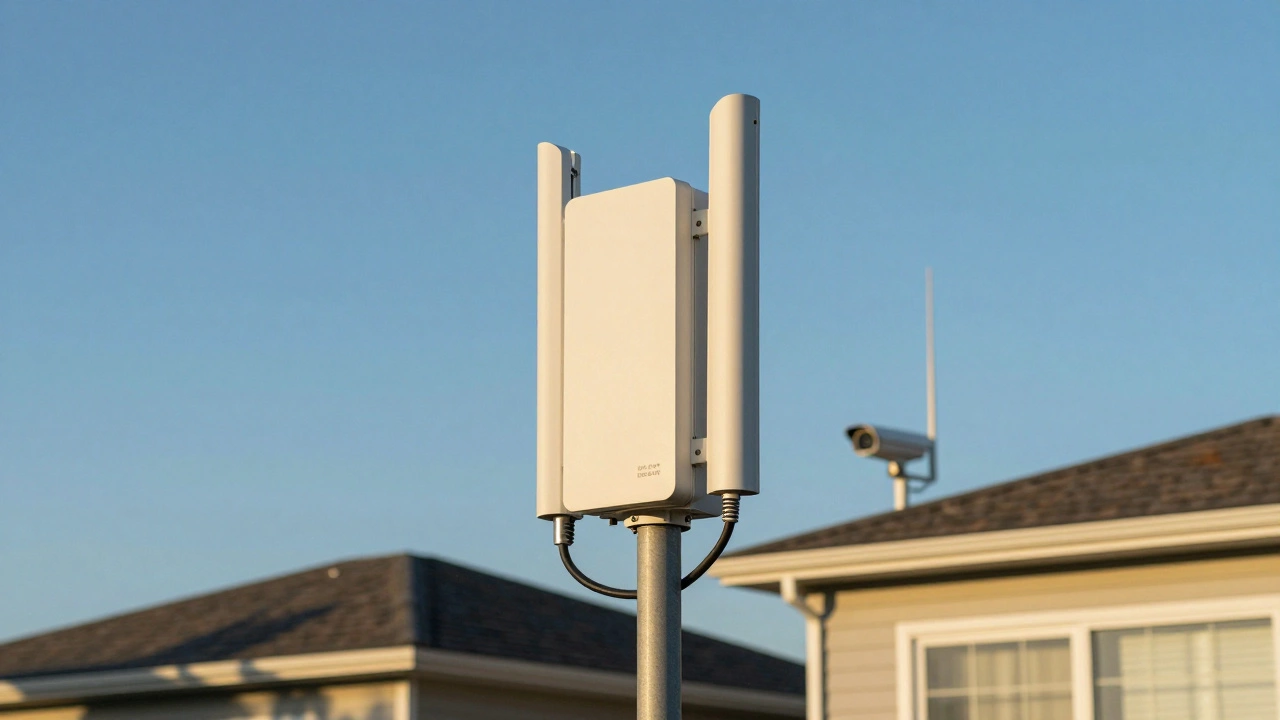
Long-Distance Wireless Setup (For Large Properties)
If you’re covering a farm, warehouse, or multi-building property, standard Wi-Fi won’t cut it. That’s where point-to-point wireless bridges come in.Here’s how it works:
- One outdoor device (CPE) is mounted near your router as a transmitter.
- Another CPE is mounted near your camera as a receiver.
- They connect wirelessly over long distances-up to 2 kilometers with clear line of sight.
- The receiver then connects to the camera via Ethernet (yes, still wired, but only a few feet long).
You configure the transmitter as an access point and the receiver as a client. Set the same SSID and password on both. Once connected, the camera sends video to the receiver, which sends it back to the transmitter, and then to your NVR.
This method is used by farms, construction sites, and businesses with large outdoor areas. It’s not for beginners, but it’s the only reliable way to cover distances beyond 200 feet.
Power Options: Plug-In vs. Battery
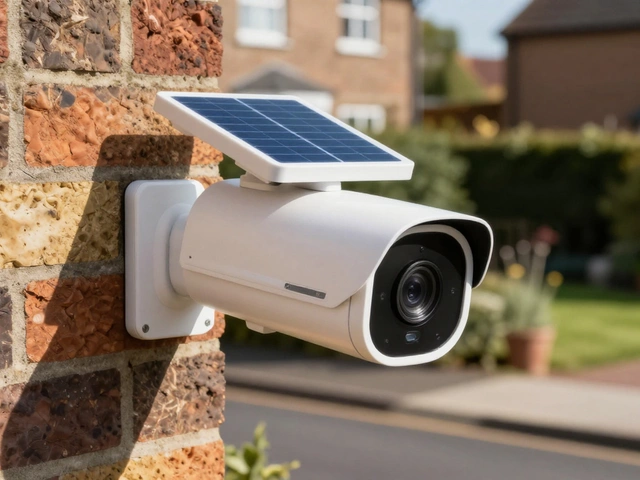
Most wireless cameras plug into an outlet. But if you can’t run a power cable-say, for a shed, gate, or tree-mounted camera-you have two choices:- Battery-powered cameras: These last 3-6 months on a charge and often have solar panels. Ideal for temporary or remote spots. Downsides? You’ll need to recharge or replace batteries.
- PoE over wireless: No such thing. Power over Ethernet only works with wired connections. If you need true wireless power, go with battery or solar.
Why Wireless CCTV Is Perfect for Modern Homes
You don’t need to be a tech expert to see the benefits:- No drilling: Perfect for renters or historic homes.
- Easy to move: If you change rooms or add a new camera, just plug it in somewhere with Wi-Fi.
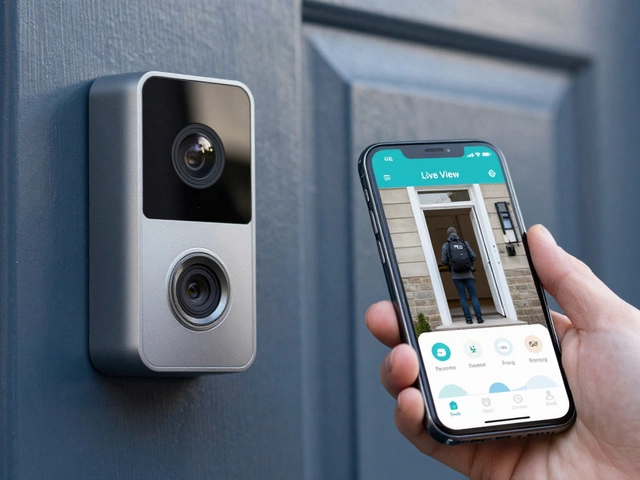
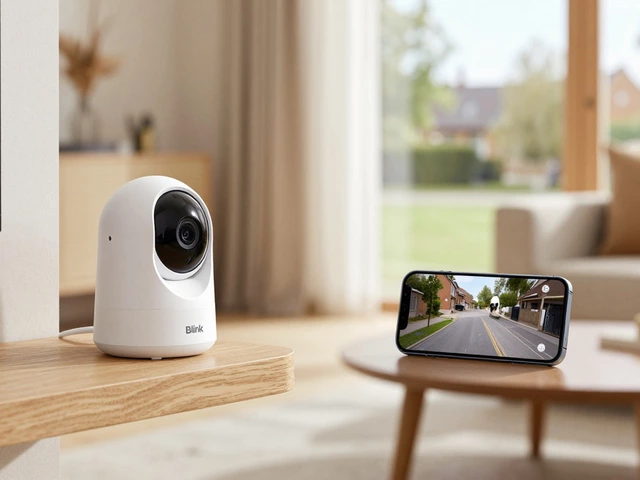
- Remote viewing: Watch live footage from your phone anywhere in the world.
- Instant alerts: Get notifications when motion is detected.
- Scalable: Add more cameras without rewiring your whole house.
It’s not magic-it’s smart engineering. And with modern cameras, reliability is no longer a concern. Brands like Reolink, Arlo, and Hikvision have made wireless systems that work consistently, even in rain or freezing temps.
Common Mistakes to Avoid
Don’t make these simple errors:- Using 5GHz Wi-Fi: Most cameras only support 2.4GHz. Your 5GHz network won’t show up during setup.
- Skipping the wired setup: Trying to pair wirelessly from scratch almost always fails.
- Placing cameras too far from the router: Signal drops after 100 feet indoors. Use extenders or bridges.
- Ignoring firmware updates: Outdated firmware can cause connection drops or security holes.
- Leaving default passwords: Hackers scan for default logins. Change yours immediately.
Final Thoughts
Connecting a CCTV camera wirelessly is about patience, not technical genius. Start wired, switch to Wi-Fi, test the signal, and secure your system. Once it’s done, you’ll wonder why anyone still runs cables.Wireless doesn’t mean weak. It means freedom. Freedom to place cameras where they’re needed-not where wiring allows. Whether you’re watching your front door, your garage, or your backyard, a properly set up wireless system gives you peace of mind without the mess.
Can I use a 5GHz Wi-Fi network for my wireless CCTV camera?
Almost never. Most wireless CCTV cameras only support 2.4GHz Wi-Fi because it travels farther through walls and is more stable for video streaming. 5GHz is faster but has a shorter range and struggles with obstacles. If your camera doesn’t connect to your 5GHz network, that’s normal. Stick to 2.4GHz.
Do wireless CCTV cameras need an internet connection?
Not for basic recording. If you’re using a local NVR or DVR, the camera only needs your home Wi-Fi to send video to the recorder. You need internet only if you want to view footage remotely from your phone or get cloud storage. For local monitoring, no internet required.
How far can a wireless CCTV camera be from the router?
Indoors, 100 feet is a safe limit. Outdoors with clear line of sight, up to 200 feet. Beyond that, signal strength drops fast. Use a Wi-Fi extender or a point-to-point wireless bridge for longer distances. Always test signal strength at the camera’s final location before mounting.
Can I use a solar panel to power a wireless CCTV camera?
Yes, if the camera supports solar charging. Many outdoor wireless cameras now come with built-in solar panels or optional solar kits. These are great for remote locations without power outlets. Make sure the solar panel gets direct sunlight for at least 4-6 hours a day.
Why does my wireless camera keep disconnecting?
Three common reasons: weak Wi-Fi signal, interference from other devices (like microwaves or cordless phones), or outdated firmware. First, check signal strength with a phone app. Move the camera closer to the router. Then update the camera’s firmware through its web interface. If it still drops, try changing your Wi-Fi channel to one less crowded (channel 1, 6, or 11 on 2.4GHz).